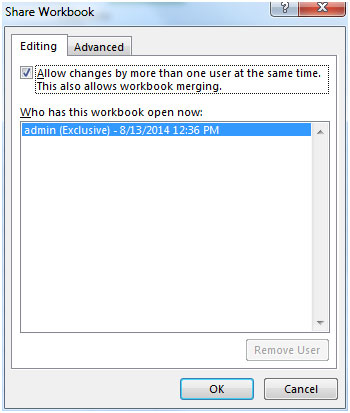
In this article, we will learn how to share and allow users to edit changes in Microsoft Excel 2010.
Microsoft Excel allows multiple users to modify the data in a worksheet simultaneously. You can create a shared workbook & place it on a shared location where many people can make the changes of the contents of the file at the same time. If an employee is working on multiple projects, and needs to update the status of the task as it finishes so that the information will be passed to the group members who are working along with. It will minimize any chance of two people doing the same task. All persons involved can enter the information for their projects in the same workbook.
The owner of a shared workbook can manage it by removing users from the shared workbook and resolving any conflicting changes. After doing all the changes, you can stop sharing the workbook.
Share a Workbook
1) Create a new workbook or open an existing workbook that you want to share to multiple users to modify any changes.
There are some limitations in a shared workbook & all the features are supported.
The following features are not working in a shared workbook:
You cannot make changes to these features after sharing the workbook.
If you want to include any of the above listed features, then you should add them before you save the workbook as a shared workbook.
Steps to Share Workbook

If you see this information then


The applications/code on this site are distributed as is and without warranties or liability. In no event shall the owner of the copyrights, or the authors of the applications/code be liable for any loss of profit, any problems or any damage resulting from the use or evaluation of the applications/code.